After that, open Microsoft Word and create a format that later we will enter the data in Excel into that format. Even better if the format or template has been provided beforehand. After that we enter the part to connect Excel and Word using Mailings.
More Tutorials:
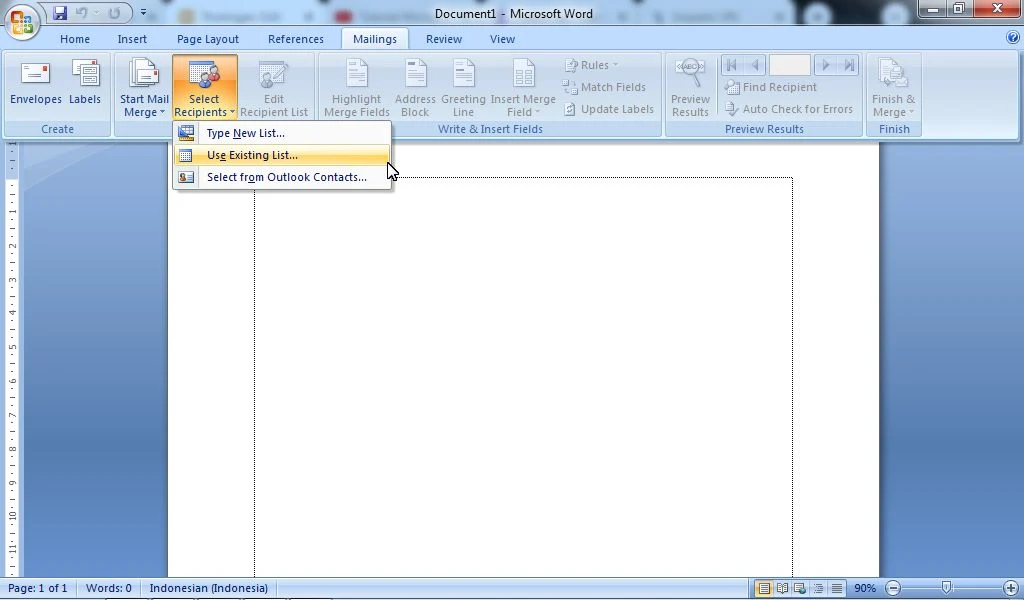
Enter the "Mailings" menu, then select "Select Recipients" and select "Use Existing List". Then a new "Select Data Source" window will appear, there, look for the Excel data that was created before, after that, select Excel, then select "Open".
After that a new window appears again, select or specify which Sheet in the Excel document that you place the data that was created. Select, for example in "Sheet 1", then click "OK". Now after that we go into the section to enter the data into the format or template that we created earlier.
To do this, open the "Insert Merge Field" in the "Mailings" menu. Now there will appear the title of the data column created in Excel earlier, place the column title according to its location in Word.
The way, place the cursor on the part where you want to place the data from excel earlier, then you click on the column headings in the "Insert Merge Field" earlier. Select the column data title according to its location. After that, to see the data, click "Preview Results". To move the data, you can click the arrows left or right.
Well, how about friends, how easy is it? That's how to make mail merge or Mailings from Excel to Word.


0 Comments