Posts

Showing posts from June, 2023

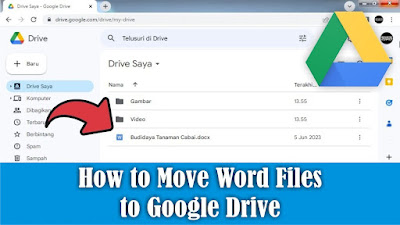
How to Create a New Folder on Google Drive

Image
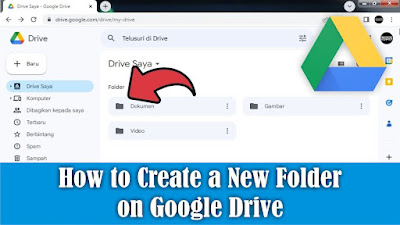
After friends enter several files into Google Drive, what next? Next is to make a folder for the file so that the files in our Google Drive are not cluttered or look neater. The way to create a new folder on Google Drive is very easy, first open Google Drive using your friends Google account. Then right-click on the mouse outside the Google Drive file, then select New Folder. Or you can also click on the down arrow next to My Drive, then select New folder. Then a New Folder dialog box will appear, fill in the name of the folder that we will create, then select or click Create. Then automatically a new folder will appear on your friends Drive and is ready to be filled with files. So how about friends, how easy is it? That's the way to create a new folder on Google Drive, I hope this tutorial can be useful for all of you.

How to Move Word Files to Google Drive

Image
Google Drive is a synchronized data storage service developed by Google. Friends can store all kinds of files on Google Drive, including Word document files that friends think are important and don't want to lose if they are stored on a computer or laptop storage. However, storage on Google Drive is limited to 15 GB, if you want to increase your storage quota, friends can buy it to get extra storage. But for me 15 GB is big enough so no need to add more. Now, to insert or move Word files into Google Drive, the method is very easy, first, friends, first open Google Drive using your Google account. After that, friends, click the down arrow next to My Drive. Then select Upload File, then please search for and select the Word file you want to include or move to Google Drive. After that, click Open and please wait because the upload process is running. After the process is complete, the selected Word file will automatically appear in Google Drive. So how about friends, how easy is it? T...

How to Move Word Files to Desktop Screen

Image
The desktop is the first screen you see when you turn on your computer or laptop. Therefore I prefer to save files on the Desktop screen compared to data storage, especially if we put the file in many folders so we spend time looking for it. In general, we move Word files to the Desktop screen by simply copying and pasting, or we can also move Word files to the Desktop screen by creating a shortcut or shortcut. In my opinion, this method is very good compared to Copy or Cut. The method is very easy, friends first select the Word file you want to move or create a shortcut on the Desktop screen, then right-click on the mouse on the file, then select Send to and select Desktop, a Word file will automatically appear in the form of a shortcut. So if we open the Shortcut file on the Desktop, it's the same as opening the original file in the storage folder so it's easier to get it. Well, how about friends, how easy is it? That's the way to move Word files to the Desktop screen. Ho...

How to Move Word Files From Laptop to Flashdisk

Image
Maybe there are still friends who are still confused about how to insert a Word file into a Flashdisk, and are confused about how to quickly move it without copying and pasting the file, even though this method is commonly used by many people. To move Word files or other files from a laptop to a flash drive, it's very easy. The first step, friends, first insert the flash drive into the USB port and make sure that your flash drive still has free space. Then find the Word file that you want to move or insert into the flash drive, then right-click the mouse on the file, then select Send To. Then several choices of places to move the file will appear, friends, select a flash drive, friends, usually called a Removable Disk. After that the file we selected earlier will automatically be copied into the Flashdisk. So how about friends, how easy is it? That's the way to move Word files from a Laptop to a Flashdisk, I hope this tutorial can be useful for all of you.

How to Insert Word Files to Google Docs

Image
Maybe friends sometimes want to edit your Word document files in Google Docs but are confused about how to move them without retyping them. Now, to move or insert Word files into Google Docs, the method is very easy. Friends open Google Docs , then open the File selection which has a folder icon on the right and select Upload and select Browse. Select the Word file you want to include in Google Docs, then click OK. Then the Word file will open with Google Docs view. So how about friends, how easy is it? That's the way to move or insert Word files into Google Docs, I hope this tutorial can be useful for all of you.

How to Recover Deleted Files on PC Computers and Laptops

Image
Maybe friends accidentally delete or delete important files on a computer or laptop, and friends are confused about how to restore the deleted files to be recovered or restored. In general, most computers or laptops use the Windows operating system, and usually when we delete a file on Windows, the file will be stored first in the trash or Recycle Bin. So, if you delete a file, try to check in the Recycle Bin whether the file you deleted earlier is in the Recycle Bin. If so, friends can restore the file by right-clicking on the mouse on the file we want to restore. Then click Restore, the file will automatically disappear in the Recycle Bin and will appear in the folder where we last saved it, for example on the Desktop. So how about friends, how easy is it? That's the way to recover deleted files on a Windows Computer or Laptop. Hopefully this tutorial can be useful for all my friends.

How to Write in Pictures in Word

Image
To add text to an image in Microsoft Word, the method is very easy, the first step is to insert the image into Word, which we will add text to later. Besides that, prepare the writing that we will enter. It's best if the pictures and writing are related to each other, it's weird if the pictures are animals but the writing is about flowers. After that, set the size of the image in Word, it's best to change it to a large size so that later the writing can be seen. To add text in the image, we can use several ways, one of which is by using a Text Box. To do this, friends go to the Insert menu and select Text Box. Then friends, fill in the writing in the text box. Then friends, set the position and size of the writing in such a way, also set the typeface and the size of the letters and the spacing if the writing is more than one line. You can also adjust the color of the writing, and if necessary, effects can be added to the writing. For setting the text box, you can make it tr...

How to Align Page Numbers in a Word Table of Contents

Image
Sometimes we see a table of contents page where the page numbers are not aligned from top to bottom so that it makes the table of contents not look good. Sometimes also on the table of contents page we often see that the page numbers are aligned, but the dotted lines are not aligned at the end. Now, to align page numbers on the table of contents page, this is related to how we line the dots in the table of contents. Do friends make it automatically or manually. If you make it manually, you can be sure that the page numbers will be misaligned from top to bottom, or if the numbers are aligned then the dotted lines are not aligned. Then the best way is to make it automatically. Now, to align page numbers on the table of contents page, the method is very easy. Friends, first make a dotted line automatically on the table of contents page because by making a dotted line automatically it will make it easier to align the page numbers. Then at the end of the dotted line, press the space bar onc...

How to Add Page Numbers in Google Docs

Image
Maybe friends who have just switched from Microsoft Word to Google docs to create a document but are still confused about adding several features, one of which is adding page numbers. Although Microsoft Word and Google docs have the same function and some features are not much different. Well, as for adding page numbers in Google docs, the method is very easy. First of all open Google docs which we will add page numbers to. To make or add page numbers in Google docs, we can find the options on the Format menu and Insert Menu. In the insert menu we can determine the position of the page number whether we will install it at the top or bottom. Or we can also make the page number not appear on the start page in Google Docs. Well, how about friends, how easy is it? That's the way to add page numbers in Google Docs, I hope this tutorial can be useful for all of you.