Posts

Showing posts from August, 2023

How to Print Certain Pages in Microsoft Word

Image
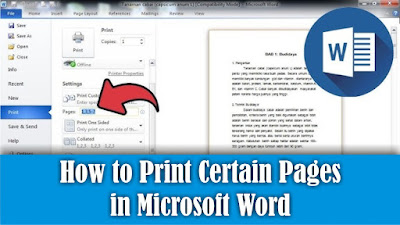
Maybe there are still some friends who are still confused about how to print certain pages in Microsoft Word, but the method is very easy. First of all, open the word document that we will print on a certain page. Then go to the Print menu. After that, friends, pay attention to the Settings section, friends, change from Print All Pages to Print Custom Range, or friends, you can directly fill in the pages that we want to print in the Pages section. The rule for writing pages to be filled in is 1-5 to print pages 1-5 only. Or you can also set the pages to be printed, namely pages 1, 3, 5-12, which means only pages 1, 3, 5 to 12 will be printed while pages 2 and 4 will not. Fill in according to the page you want to print or print. After that, click Print to continue with the printing process. So how about it friends, it's easy, right? That's how to print non-consecutive pages or certain pages in Microsoft Word.

How to Print a Lot of Pictures on One Page

Image
Maybe friends want to print a large number of photos in Word, but the photos must be the same and have the same size. The method is very easy, in this tutorial I will share it with all my friends. First, insert the photo that we want to print, then set the photo in length and width and place it on the edge of the work paper. Then friends, click on the image, then press the Ctrl key on the keyboard, don't release it, then click again on the image, hold down, don't release the click first, then move the mouse to the side of the image. Do the same for the image next to it. So, for the bottom image, friends, press the Ctrl key on the keyboard, don't release it, then click on all the images then click on the image again then slide it down. Do the same thing for the image below again. So, how about it friends, it's easy, right? That's how to print lots of photos on 1 paper in Microsoft Word.

How to Add New Blank Page in Microsoft Word

Image
Maybe some of you are still confused about adding a new paper page in Microsoft Word. So, in this tutorial I will share how. There are several ways to create a new page in Microsoft Word. The first way, we can press the enter key on the keyboard at the end of the page until a new page appears. Or we can also create a new page by pressing the Ctrl key and the Enter key on the keyboard so that a new page appears. Alternatively, we can go to the Insert menu, then select Blank Page. Friends, just choose the method which you think is easier and quicker to do. So, how about it friends, it's easy, right?

How to Combine 2 Word Files Into One

Image
Maybe friends don't think so, it turns out that Word files can also be combined into one, this method is very good when friends are confused about typing so we just have to take the text from another document and make it into one. As for how to combine two Word files into one method, it is very easy, first open the document file that you want to combine. Next, friends, place the cursor at the beginning or end of the document, if you want to add text from another document to the beginning or end of the text. After that, go to the "insert" menu, then select "Object", then select "Text from file", look for the documents we want to combine. Click the file and click "Insert". Now automatically the file or text in the other document will appear, you just need to arrange it to match the existing file. So, how about it friends, it's easy, that's how to combine Word files into one.

How to Set Automatic Indentation in Google docs

Image
What is meant by automatic indentation in a paragraph is the same as the indented line at the beginning of the paragraph. So, instead of friends getting tired of organizing it, it's better if we make the indentation automatic. In this tutorial I will share how. First open the document file in Google docs, then go to the format menu then select Alignment & Indent, then select Indent Options. Then a new Indent options window will appear, pay attention to the special indent section, change it from none to the first line. After that, change the size of the indentation or indentation according to your needs, then select apply to save the settings and apply to the document. Now the indent will automatically be indented according to the distance specified earlier. How about it friends, it's easy, right? that's how to set automatic indentation on the first line of a paragraph in Google docs.

How to Delete Files in Google Drive in Bulk

Image
Maybe there are still friends who are still confused about deleting files in Google Drive, but there are so many files to be deleted that it will be difficult to delete them one by one. So, I will share how to delete lots of them at once. OK, straight away, friends, click on one of the files in Google Drive, then friends, press the Ctrl button and the A button on the keyboard to select or mark all the existing files. Then, friends, pay attention to the three dots at the top of the file you selected. Click the three dots, several options will appear, select Move to trash. So, the selected file will automatically be deleted and will be moved to the Google Drive trash. How about it friends, it's easy, right? That's how to delete lots of files in Google Drive at once, I hope this tutorial is useful.

How to Print Black and White on pdf Files

Image
Maybe there are still some of you who haven't or are still confused about how to print in black and white or print without color on PDF files, especially on the Foxit Reader application. So in this tutorial I will tell you how. OK, straight away, friends, open the PDF file using the Foxit Reader application, then go to the print menu by clicking on the printer icon or by pressing the Ctrl and P keys simultaneously on the keyboard. To be able to print without color or just in black and white, friends, you can immediately check the words Print at Grayscale, then it will automatically remove the color from the PDF file. Friends, you can see the changes in the preview display on the right. After that, you can immediately click OK to continue with the printing process and you can see the results. So, that's how to print black and white on PDF files in the Foxit Reader application, I hope this tutorial is useful.

How to Extract One Files From a .rar File

Image
 This tutorial is useful if you want to extract or remove files in a Rar file, but you don't want to extract all the existing files. Previously here I used the WinRar application to open Rar files, if you haven't installed it yet, please install it first. OK, straight away, friends, open the Rar file from which we will extract one of the files, then friends, right click on the mouse on one of the files you want to extract. Then several options will appear to extract files, namely "Extract to a specified folder" and "Extract without confirmation". To make things easier, I will choose "Extract without confirmation", so that the extracted file will appear in the same folder as the Rar file. Friends, just click "Extract without confirmation", and the file will automatically come out of Rar. How about it friends, it's easy, that's how to extract one of the files in a rar file. Hopefully this tutorial can be useful for all of you.