Posts

Showing posts from December, 2022

How to Print 1 Image Into 2 Parts in Microsoft Word

Image
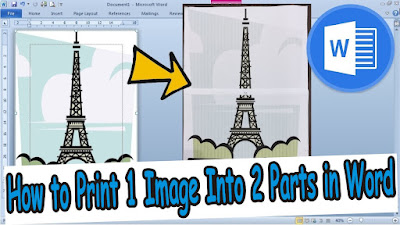
The method is very easy, friends, first enter the image that will be printed into two parts of paper in Word. I'm sure my friends already know how to insert pictures in Word, friends, set the width and height of the pictures so that they fit in one worksheet. After that friends enter the Print menu. Now in this way I use a Canon brand printer, for other printer brands I don't know maybe this feature exists. After entering the Print menu, friends select or click Properties. After that a new Canon Properties window will appear. Friends, click the Page Setup menu in Canon Properties, then in the Page Layout section, change it from Normal-Size to Tiling/Poster. In the preview on the left, the paper that was once divided into 2 parts or paper. After everything has been set, you click OK to save the settings, and click Print to continue with the printing or printing process, and you can see the results. More Tutorials: How to Insert 2 Tables Side by Side in Word How to Copy Table in ...

How to Move One Word Page to Another Word Document

Image
Maybe friends are making a paper or assignment, where one of the pages in the paper is obtained from another word document that happens to exist. So, instead of getting tired of typing again, we'd better just move it by copying it. The method is very easy, friends can immediately select or select all the writing on one page that you want to move to another document. Then friends right-click on the mouse and select copy, or you can also press the Ctrl key and the C key on the keyboard simultaneously. After that, we move on to the other document, where all you have to do is create a new page. If what we copied earlier wanted to be moved to the last page, friends can immediately create a new page at the end of the document by placing the cursor at the end of the text then pressing enter until a new page appears. The method is the same, if you want to place the copy in the middle of the document. After creating a new page, friends can immediately paste the writing from one page earlier...

How to Copy Paste Tables from Word to PowerPoint

Image
Maybe friends are making a presentation in PowerPoint from the results of reports done in Word, there are also tables that you want to include in the PowerPoint. Instead of getting tired of re-creating tables, it's better if the existing tables in Word are copied into PowerPoint. As for the way to copy and paste a Word table to ppt, the method is very easy, friends, all you have to do is select or select all parts of the table that will be moved to ppt without exception. Then friends directly copy it, after that open the PowerPoint file. Friends, create a new slide, the new slide created is the "Title Only" slide. After that, paste the table from Word earlier, friends, adjust the width of the table with the width of the existing slide, friends can also add a title or table title to the existing text box. For advanced table settings in PowerPoint, friends can set them in Table Tools on the Design and Layout menu. More Tutorials: How to Make Big Curly Brackets in Word How t...

How to Set Print Area in Microsoft Excel

Image
Just as the name suggests, Print Area in Excel is used to mark the area you want to print or print. If you have marked the area you want to print, then other areas on the Excel work page other than the marked area will not be printed. The way to set the Print Area is very easy, you just highlight or mark the cells to be printed. After that friends go to Page Layout, then friends select Print Area and select Set Print Area. Automatically the area we selected earlier will appear dotted line around it. However, try to make sure that the area we selected earlier is sufficient for one page of paper, otherwise the print area we selected earlier will be clipped onto the next sheet of paper.

How to Show Rulers in Excel

Image
Maybe my friends had asked, do you really have a ruler in Excel? friends rarely see the ruler in Excel because most of the Excel views that are used or that appear on the Excel work page are Normal views. Meanwhile, the ruler or ruler in Excel appears in the Workbook Page Layout view. Now, to bring up the ruler in Excel, the method is friends, just go to the View menu and then put a checklist on the Ruler. Automatically after friends check the Ruler, a ruler will appear at the top and the left side of the Excel work page.