Posts

How to Print One Big Picture on Multiple Pages
Image
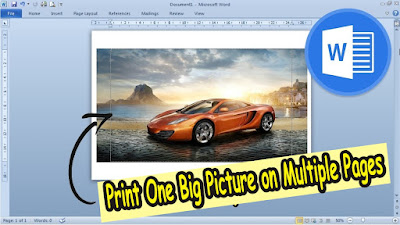
In this tutorial, we will print an image into several parts, it can be 1 image into 2 or 16 parts. However, to print it into several parts we need to use a Canon printer, I don't know if I can use another printer because here I am using a Canon printer. Okay, let's just do it. First of all, provide the image that will be printed into several parts, of course, put it in Microsoft Word. Then friends enter the "Print" menu by pressing the Ctrl and P keys simultaneously. Then friends go to "Canon Properties", select the "Page Setup" menu, in the "Page Layout" section change from "Normal size" to "Tiling/Poster". To organize it into several sections, friends click "Specify". Change from "Divided into 2" to "Divided into 4" or to "Divided into 16", according to what your friends want. After that click "OK" to save the settings and please print and see the results. More Tutori...

How to Remove Table Lines in Word Without Using an Eraser

Image
Well, the Eraseris one of the features on tables in Word which functions to delete unnecessary table lines, but for one reason or another you sometimes don't find the location of this Eraser so it's a headache if you want to delete lines in tables. It turns out that we can also delete table lines in Microsoft without using Eraser, how to use "Borders and Shading". The method is friends, first select the part of the table that will delete the lines, then friends enter the " Home " menu then in the " Paragraph " section, friends select " Borders ". Then friends can choose " No Border ", automatically the lines in the selected part of the table will disappear. More Tutorials: How to Remove Text Box Lines in Word How to Hide Scrollbar But Still Scroll How to View Scroll Bar in Word How to Print 4 Pictures on One Page in Word 2010 More Tutorials: How to Change Footnote Fonts in Microsoft Word 2010 How to Copy a Logo From a Laptop/Com...

How to Make Big Curly Brackets in Word

Image
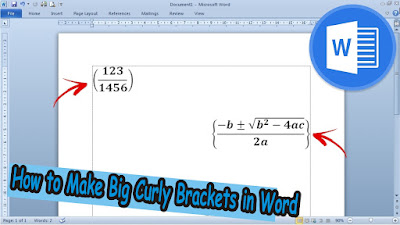
Usually we make brackets to fill them with writing where the size of the brackets is not that big or just standard. However, sometimes we also have to make brackets that contain a formula or fraction that requires the brackets to be large. Well, to make parentheses large enough to fit the contents such as formulas or fractions, the method is very simple. Here we use the parentheses in the Equation, found in the "Insert" menu. Friends go to "Equation" then friends select "Bracket", found in the "Structures" section. More Tutorials: How to Remove Text Box Lines in Word How to Hide Scrollbar But Still Scroll How to View Scroll Bar in Word How to Print 4 Pictures on One Page in Word 2010 In this bracket, friends can choose various shapes and sizes of brackets according to the needs and wishes of friends. After friends select the desired form of brackets, friends can fill in the brackets by clicking on the small box inside. Can fill it with writing, o...

How to Show Formula Bar on Excel

Image
The formula bar is the formula box located at the top of the Excel worksheet, this formula bar functions to bring up formulas in performing calculations in Excel. The way to display or remove the formula bar in an Excel worksheet is very easy and for sure all of your friends already know it, first open the Excel 2007 worksheet, then select the "View" menu. On the View menu, there are several commands in it. To display and remove the Formula Bar, friends, please check the box that says "Formula Bar" to appear, whereas if you want to remove it, please remove the check by clicking the small box again. That's all for my tutorial on this occasion entitled how to show and remove the Formula Bar in Microsoft Excel 2007, I hope friends will get some knowledge from this tutorial. Don't forget to check out our other recent tutorials. good luck More tutorials: How to Show Margins in Excel 2007 Print Preview How to Clear Print Area in Excel How to Open 2 Different Excel...