Posts

How to Set Margins to 3222 in Microsoft Word

Image
Maybe friends are working on a paper assignment, and one of the rules that must be followed is setting the margins with a size of 3222. The 3222 margins here mean 3 cm left margin, 2 cm top margin, 2 cm right margin, and 2 cm margin. bottom 2 cm. Okay, go ahead, friends, enter the Page Setup menu, then select Margins and select Custom Margins for advanced margin settings. Then a new window will appear, where friends can directly set the top margin, left margin, right margin, and bottom margin. After everything has been set according to the size that has been determined, friends can immediately click OK to save the settings. And automatically the margins will be adjusted to the size of the margins that we set earlier. More Tutorials: How to Make Big Curly Brackets in Word How to Delete Page Number in Specific Page How to Set Password for Word Document 2007 How to Divide Into 4 Microsoft Word How to Remove Red Underline in Word
How to Change Footnote Fonts in Microsoft Word 2010

Image
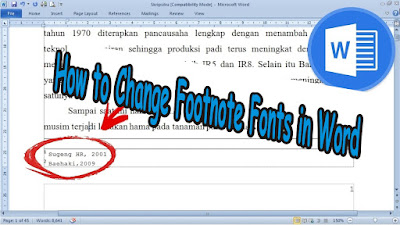
So, if you are wondering, can you change the footnote font? or how to change the footnote font type in word? I answered, the method is very easy and the method is the same as we change the font in writing as usual. Friends only mark or select the footnote that you want to change the type of writing, after that friends enter the Home menu then select the type of font or writing that you want to use in the Font Style. Friends, just choose the writing style and automatically after friends click on the type of font that friends want, it will change the font in the footnote or footnote in Word. More Tutorials: How to Remove Table Lines in Word Without Deleting Text How to Print 2 Pages 1 Paper in Word 2007 How to Print on B5 Binder Paper How to Print One Big Picture on Multiple Pages How to Remove Table Lines in Word Without Using an Eraser

How to Copy a Logo From a Laptop/Computer to Microsoft Word 2010

Image
Maybe some of you want to make a cover page that requires a logo, we can insert the logo quickly without requiring a lot of steps. Usually if we want to insert a logo into a word page, we need to enter the Insert menu and select an image on a laptop or computer. So it turns out that we can directly copy it, the method is very easy and the same as we copy as usual. Friends, first look for the logo on your laptop or computer storage, then open Microsoft Word. Re-open the logo folder that you want your friends to enter into word, right-click on the mouse on the logo and select Copy, or you can directly press the Ctrl key and P key simultaneously on the keyboard. Then friends reopen Microsoft Word. Paste the logo on the word page by right-clicking the mouse on the Word page and then selecting Paste, or you can also press the Ctrl key and the V key simultaneously on the keyboard to speed up the process. Now after that the logo will automatically appear on the Word page, then friends can imm...

How to Set Default Paper Size in Word

Image
Well, usually if we open a new document in Microsoft Word to do a job, we will first reset the paper size to match the paper size we will use for printing. It would be great if the new document we open would default to the paper size we want.  The way to set the default paper size in Word is very easy.  First enter the "  Page Layout  " menu then select "Size". More Tutorials: How to Rotate Text in Table in Microsoft Word How to Delete Table in Microsoft Word Mail Merging With Microsoft Excel and Word How to Remove Text Border in Word How to Change Tab Stops in Word Then select "More Paper Size" again, after which a new "Page Setup" window will appear.  Specify the desired paper size, for example A4 paper size, then click "Default" located in the lower left corner of Page Setup.  A notification dialog box will appear, click "Yes" to confirm it. After that, try to close the Word document and open a new Word document and see the...