Posts

How to Set Automatic Tabs to Indent Paragraphs When Entered

Image
Can you create automatic paragraphs? where if we enter from the first paragraph to the second paragraph automatically at the beginning of the paragraph it will be indented. It will definitely make it easier for friends to type in Word. Well, the method is very easy. First go to the " File " menu then select " Option ", then select " Proofing " then select " Auto Correct Options ". Then a new " AutoCoorect " window will appear, then select the " AutoFormat As You Type " menu and check the box " Set left-and first-indent with tabs and backspace ". After that click " Ok " to save the settings and click " Ok " again. Then friends can try to make a new paragraph by entering at the end of the previous paragraph. Automatically the new line will be indented. More Tutorials: How to Insert 2 Tables Side by Side in Word How to Copy Table in Word How to Delete Text Box in Word How to Print on Microsoft Word 2...

How to Set A5 Paper Size in Word

Image
The way to set or set the A5 paper size in Microsoft Word is very easy. Friends enter the Page Layout menu, then select Size, after that several paper size options will appear that you can choose from. Because we will set the paper size to A5 paper size, so we choose A5 paper size (14.8 cm x 21 cm). If there is no A5 paper size in this option, friends can set the A5 paper size by selecting More Paper Size. After that a new Page Setup window will appear, friends enter A5 paper sizes, namely Width: 14.8 cm and Height: 21 cm. Then click OK to save the settings and see the results, the paper size on the Word worksheet has changed. More Tutorials: How to Insert 2 Tables Side by Side in Word How to Copy Table in Word How to Delete Text Box in Word How to Print on Microsoft Word 2007 How to Insert Portrait and Landscape in Same Word Document

How to Rotate a Photo or Image in Microsoft Word

Image
Maybe some of you are still confused when you insert a picture in Microsoft Word and you want the picture to be rotated for one reason or another. The method for rotating photos or images in Word is very easy. First of all, friends click on the picture or photo that friends have entered into Word. Then point the cursor at the green circle at the top of the image or photo, until the cursor changes to a rotating arrow. Then click and hold the green circle, then swipe to the bottom left or swipe to the bottom right until the image or photo rotates. Friends play the picture or photo according to your wishes and needs. After friends have determined the right position when the image or photo is rotated, friends release the click on the mouse earlier. More Tutorials: How to Insert 2 Tables Side by Side in Word How to Copy Table in Word How to Delete Text Box in Word How to Print on Microsoft Word 2007 How to Insert Portrait and Landscape in Same Word Document

How to Print 1 Image Into 2 Parts in Microsoft Word

Image
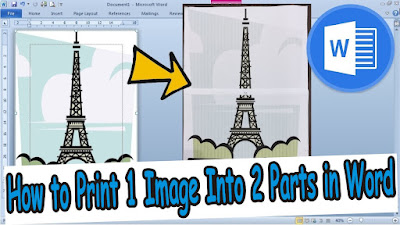
The method is very easy, friends, first enter the image that will be printed into two parts of paper in Word. I'm sure my friends already know how to insert pictures in Word, friends, set the width and height of the pictures so that they fit in one worksheet. After that friends enter the Print menu. Now in this way I use a Canon brand printer, for other printer brands I don't know maybe this feature exists. After entering the Print menu, friends select or click Properties. After that a new Canon Properties window will appear. Friends, click the Page Setup menu in Canon Properties, then in the Page Layout section, change it from Normal-Size to Tiling/Poster. In the preview on the left, the paper that was once divided into 2 parts or paper. After everything has been set, you click OK to save the settings, and click Print to continue with the printing or printing process, and you can see the results. More Tutorials: How to Insert 2 Tables Side by Side in Word How to Copy Table in ...